 Make a Vegetable Ferment
If you've never attempted to make a vegetable ferment, don't worry—you can do it! Vegetable ferments are a bit more challenging than dairy ferments, but once you get the hang of it, you'll enjoy the incredible benefits and creative possibilities of fermenting your favorite vegetables.
Beets, carrots, and cabbage work particularly well as ferments, and some tasty combinations include carrots, daikon radish, and ginger. The possibilities are endless! If you have vegetables, salt, and a proper container, you have all you need to create a probiotic "wonder food."
- Vegetables. Whenever possible, use organic. The chemicals in pesticides may hinder the fermentation process.
- Salt. Use an unrefined salt such as sea salt. Himalayan salt is also an excellent option.
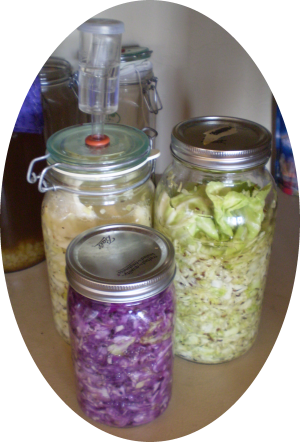
- Container. You have numerous options. The ideal containers keep oxygen out and allow carbon dioxide to release. Many use Fido jars or mason jars successfully. Others use air locks attached to mason jars. Fermentation crocks can be heavy and cumbersome, but offer an ideal way to make large amounts of sauerkraut successfully.
Sources for containers/air-lock systems include:
- Starter (optional). You may use a culture starter, whey, or juice from a previous ferment to help boost the fermenting process. Online sources for starter cultures include:
Sauerkraut Recipe
The simplest vegetable to ferment is cabbage. Cabbage contains lots of the beneficial microorganisms needed for fermentation. Green or red cabbage will work, although green cabbage is a bit quicker to release its juices.
Ingredients:
- 1 medium cabbage
- 1 tbsp. sea salt
- 1 tbsp. caraway seeds
- 1 small sour apple
- Starter (optional)
Directions:
Clean the cabbage. Save a few leaves as you will use them as a top layer for the kraut. Shred cabbage on a coarse grater or with the shredding blade in a food processor. Mix all ingredients in a large bowl. Transfer to jar or crock a bit at a time and pack tightly. Repeat until the pot is 80% full. Cover the final layer with a few large leaves.
As you pack the cabbage you will see the release of juices. This is the brine. You want this liquid to cover the packed cabbage to insure an anaerobic environment for the kraut, which allows the beneficial bacteria to multiply. Place weights on the leaves if needed to keep the kraut below the brine. Seal with an air lock or airtight lid.
Keep container out of direct sunlight at room temperature for 3-5 days. The fermentation activity will be evident. You may see the brine bubble out of the container, so keep a towel close by.
The next step, according to the book Making Sauerkraut and Pickled Vegetables at Home by Klaus Kaufmann and Annelies Schoneck, is to "put pot in a cool place for two to three weeks. In order for a slow fermentation to take place the temperature should be around 59 degrees." Move to refrigerator after this 2-3 week period. The sauerkraut can be eaten after 4 weeks, but will be better if left for 6 weeks (or even longer!).
 Many recipes call for a shorter fermentation time. The key is keeping the oxygen out of the kraut while it is fermenting. You will find a process that works for you. For more suggestions and an in-depth look at the health benefits of vegetable fermentation, see A Guide to Raw Cultured Vegetables.
If you're daunted by the process, go ahead and jump in anyway. You'll be an expert "fermenter" before you know it, enjoying the many health benefits of naturally fermented foods!
Need some encouragement for taking the plunge into homemade ferments? Andrea demonstrates making sauerkraut, proving that it really isn't as daunting as you may have thought!